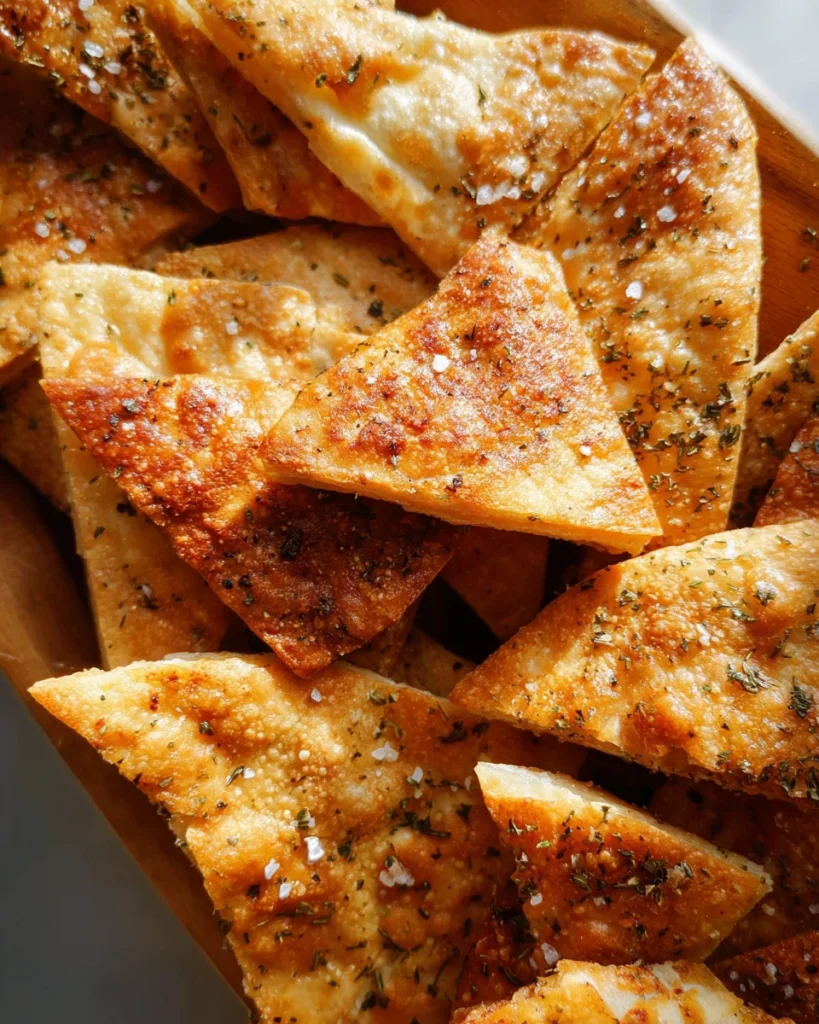
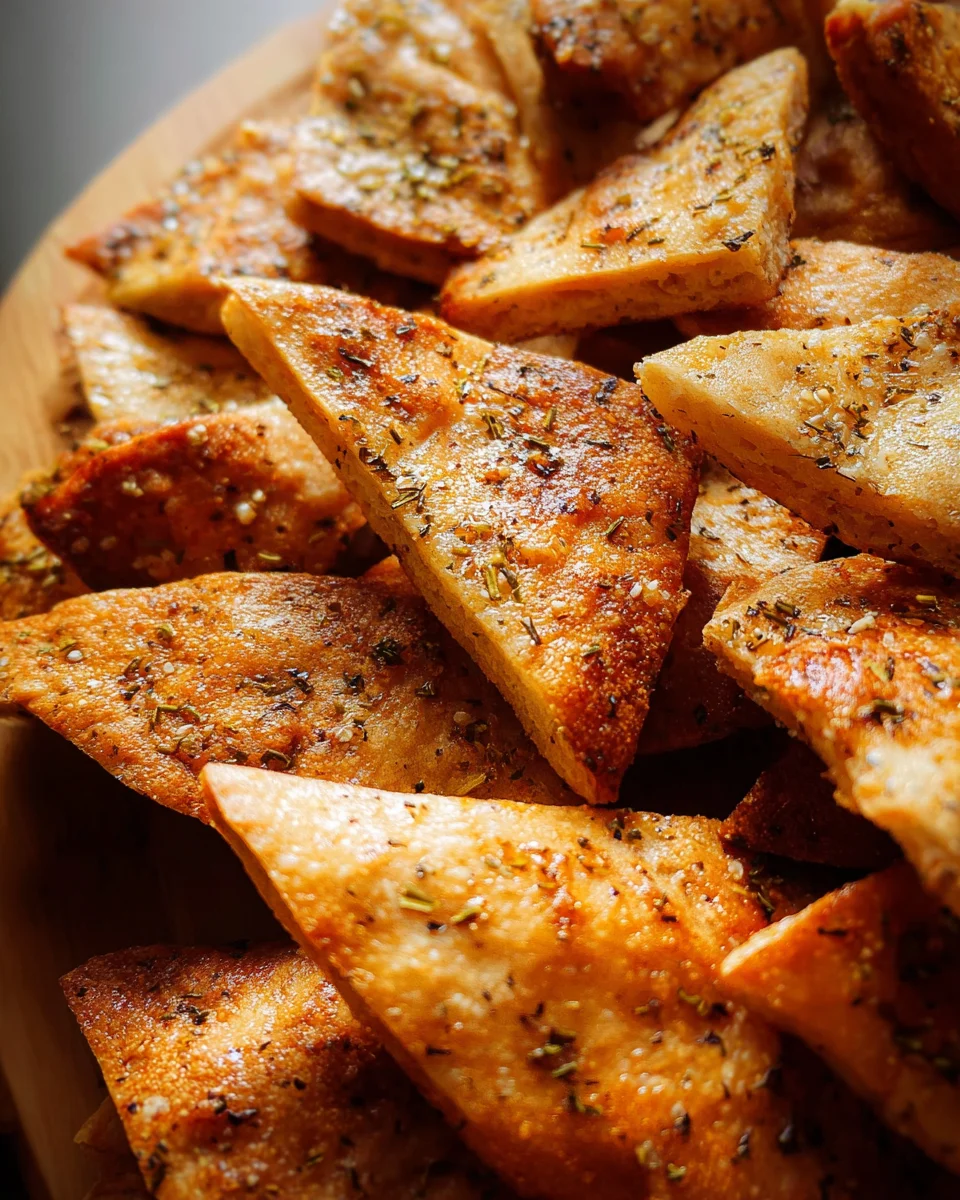
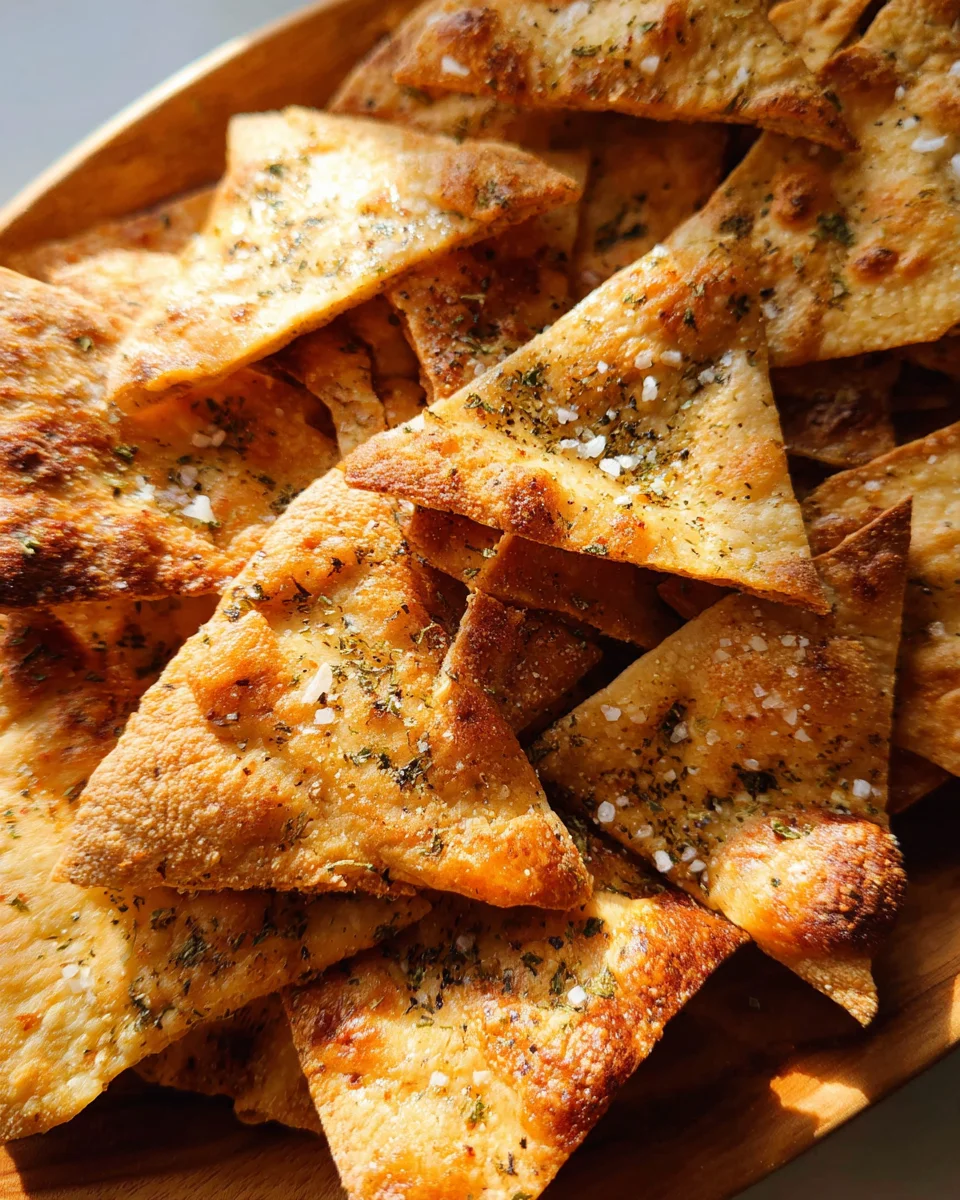
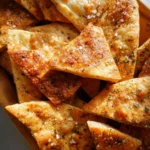
Make the best homemade pita chips with this simple recipe! These crispy pita chips are baked, not fried, making them a healthier snack option. Perfect for parties, movie nights, or as a quick snack, they are versatile and easy to customize with your favorite seasonings. Plus, their golden color and crunch will elevate any dip you serve them with.
Why You’ll Love This Recipe
- Quick and Easy: This recipe takes minimal time to prepare and cook, perfect for last-minute gatherings.
- Healthy Alternative: Baked instead of fried, these pita chips are a guilt-free snack option that still satisfy your cravings.
- Customizable Flavors: With optional seasonings like za’atar or sesame seeds, you can tailor the flavor to suit your taste.
- Great for Dipping: Pair these chips with hummus or guacamole for a delicious appetizer that everyone will enjoy.
- Long-Lasting Crunch: Store them easily in an airtight container for up to two weeks without losing their crispness.
Tools and Preparation
To make your homemade pita chips, you’ll need a few essential tools. Having the right equipment makes the process smoother and more enjoyable.
Essential Tools and Equipment
- Baking sheets
- Parchment paper
- Kitchen shears
- Chef’s knife
- Brush
Importance of Each Tool
- Baking sheets: Provide a sturdy base for baking and ensure even cooking of the pita chips.
- Parchment paper: Prevents sticking and allows for easy clean-up after baking.
- Kitchen shears: Make cutting the pita into rounds quick and effortless.
- Chef’s knife: Ideal for cutting the stacked pita into wedges evenly.
Ingredients
Here’s what you’ll need to make your homemade pita chips:
- 4 pita breads (5 to 8 inches in diameter), whole wheat or regular
- 2 to 3 tablespoons olive oil, as needed
- 1 teaspoon flaky sea salt or kosher salt
- Optional additional seasonings: za’atar, sesame seeds, dried oregano, dried minced onion, or garlic
How to Make Homemade Pita Chips
Step 1: Preheat the Oven
Adjust two oven racks to the middle and upper third positions. Preheat the oven to 350 degrees Fahrenheit. Line two large, rimmed baking sheets with parchment paper for easy clean-up.
Step 2: Prepare the Pita Bread
Using kitchen shears, cut around the perimeter of each pita and separate each pita into two thin rounds. If the pita doesn’t easily separate, gently use a serrated knife to cut between the layers.
Step 3: Oil and Season the Rounds
Working with one round at a time:
1. Brush the smooth side lightly with oil all over.
2. Flip it over and brush the rough side generously with oil.
3. Sprinkle it lightly with salt and optional seasonings. If using flaky salt, crush it between your fingers as you sprinkle.
Step 4: Cut Into Wedges
Repeat with the remaining rounds, stacking them on top of each other as you go. Divide the stack into two for ease of cutting. Use a chef’s knife to cut each pita stack into eight wedges. Spread the wedges, rough side up, in a single layer across the two prepared baking sheets.
Step 5: Bake Until Crisp
Bake until the wedges are golden brown and crisp, about 10 to 12 minutes. Rotate and switch the sheets halfway through baking. The pan on the top rack will likely finish first; leave the pan on the middle rack in for a couple more minutes if needed.
Step 6: Cool Before Serving
For maximum crispiness, let the pita cool completely on the pans before serving. Store in a sealed bag at room temperature for up to two weeks.
Enjoy your homemade pita chips as a delightful snack or appetizer!
How to Serve Homemade Pita Chips
Homemade pita chips are versatile and can be paired with various dips and spreads. Whether you’re hosting a gathering or enjoying a quiet night in, these crispy chips make for an excellent snack. Here are some delightful serving suggestions.
With Dips
- Hummus: This classic Middle Eastern dip complements the flavor of pita chips perfectly. Choose from traditional, roasted red pepper, or garlic hummus.
- Tzatziki: A refreshing yogurt-based dip with cucumber and herbs that adds a cool contrast to the crunch of the chips.
- Guacamole: For a twist, serve homemade pita chips with creamy guacamole for a fusion of flavors.
- Spinach Artichoke Dip: Warm and cheesy, this dip creates a rich pairing that’s sure to please any crowd.
As a Snack
- Cheese Platter: Pair your pita chips with assorted cheeses for a gourmet snack. Include soft cheeses like brie or hard cheeses like aged cheddar.
- Veggie Sticks: Serve with fresh vegetable sticks like carrots, celery, and bell peppers for a healthy crunch alongside your pita chips.
- Salad Topping: Sprinkle broken pita chips over salads for added texture and flavor.
In a Meal
- Mediterranean Bowl: Use pita chips as a crunchy topping on grain bowls filled with quinoa, grilled veggies, and chickpeas.
- Soup Accompaniment: Enjoy your pita chips dipped into hearty soups such as tomato basil or lentil soup for added crunch.
How to Perfect Homemade Pita Chips
To achieve the best homemade pita chips, attention to detail is key. Here are some tips to elevate your chip-making game.
- oil application: Ensure you brush enough olive oil on both sides of the pita rounds. This helps them crisp up nicely in the oven.
- Even seasoning: Sprinkle salt and optional spices evenly across each round before baking to enhance flavor without overwhelming the chips.
- Proper baking time: Keep an eye on the baking process. Rotate the pans halfway through for even browning; this ensures all wedges become golden and crispy.
- Cooling completely: Let the baked pita chips cool completely on the pans. This step is crucial for achieving maximum crunch before serving.
Best Side Dishes for Homemade Pita Chips
Homemade pita chips can be complemented beautifully by various side dishes. They add variety and enhance your overall snack experience. Here are some great options:
- Falafel: These crispy chickpea balls are flavorful and pair well with both hummus and tzatziki.
- Stuffed Grape Leaves (Dolmas): A traditional Mediterranean dish that offers a tangy taste complementing your pita chips perfectly.
- Roasted Vegetables: Seasoned roasted vegetables provide a warm side that contrasts well with crunchy pita.
- Tabbouleh Salad: This fresh salad made from parsley, tomatoes, and bulgur wheat brings bright flavors that balance out the richness of dips.
- Eggplant Baba Ganoush: A smoky eggplant dip that is creamy and delicious when served alongside pita chips.
- Chicken Shawarma Skewers: Marinated chicken skewers add protein to your snack table while enhancing Middle Eastern flavors.
- Feta Cheese Dip: Creamy feta mixed with herbs makes an enticing spread that pairs wonderfully with crispy chips.
- Yogurt Sauce with Herbs: A light yogurt sauce seasoned with mint or dill can provide a refreshing dip option alongside your homemade snacks.
Common Mistakes to Avoid
Making homemade pita chips can be easy, but some common mistakes can affect the outcome. Here are a few to watch out for.
- Boldly skipping oil: Not using enough olive oil can result in dry chips. Make sure to brush both sides of the pita rounds for optimal flavor and crispiness.
- Boldly overcrowding the baking sheets: Placing too many wedges on one sheet can lead to uneven cooking. Spread them in a single layer to ensure they become crispy all over.
- Boldly ignoring oven temperature: Baking at too high or too low a temperature can burn or undercook your chips. Stick to 350 degrees Fahrenheit for the best results.
- Boldly neglecting seasoning options: Missing out on additional seasonings means losing flavor potential. Experiment with za’atar or sesame seeds for a delicious twist.
- Boldly skipping the cooling step: Serving chips immediately from the oven may result in sogginess. Allow them to cool completely on the pans for maximum crunch.
Storage & Reheating Instructions
Refrigerator Storage
- Store in an airtight container for up to 1 week.
- Ensure the chips are completely cool before sealing.
Freezing Homemade Pita Chips
- Place cooled chips in a freezer-safe bag or container.
- Freeze for up to 3 months for best quality.
Reheating Homemade Pita Chips
- Oven: Preheat to 350°F and bake for 5-7 minutes until warm and crispy.
- Microwave: Heat on a microwave-safe plate in 10-15 second intervals, but this may not retain crispness.
- Stovetop: Warm in a skillet over medium heat for a couple of minutes, turning frequently until heated through.
Frequently Asked Questions
Here are some common questions about making homemade pita chips.
How do I make homemade pita chips crispy?
To achieve crispy homemade pita chips, ensure you use enough olive oil and bake them at the right temperature until golden brown.
Can I use whole wheat pita bread?
Yes! Whole wheat pita bread works perfectly for homemade pita chips, adding extra fiber and flavor.
What seasonings can I use with homemade pita chips?
Feel free to experiment! Za’atar, garlic powder, onion powder, or even chili flakes can enhance your homemade pita chips’ flavor.
How long do homemade pita chips last?
Homemade pita chips can last up to one week when stored properly in an airtight container at room temperature.
Final Thoughts
Homemade pita chips are not just simple to make; they are also incredibly versatile. You can customize them with various seasonings or dips, making them perfect for any occasion. Try this recipe today and enjoy the delightful crunch!
Homemade Pita Chips
Enjoy delicious Homemade Pita Chips that are crispy and easy to make! Perfect as a snack or appetizer. Try this quick recipe today!
- Prep Time: 10 minutes
- Cook Time: 12 minutes
- Total Time: 22 minutes
- Yield: About 8 servings 1x
- Category: Snack
- Method: Baking
- Cuisine: Mediterranean
Ingredients
- 4 pita breads (whole wheat or regular)
- 2 to 3 tablespoons olive oil
- 1 teaspoon flaky sea salt or kosher salt
- Optional seasonings: za’atar, sesame seeds, dried oregano, garlic powder
Instructions
- Preheat the oven to 350°F. Line two baking sheets with parchment paper.
- Using kitchen shears, cut each pita into two thin rounds.
- Brush both sides of each round with olive oil and sprinkle with salt and optional seasonings.
- Cut each stack into wedges and spread them in a single layer on the baking sheets.
- Bake for 10-12 minutes until golden brown and crisp, rotating pans halfway through.
- Allow to cool completely before serving.
Nutrition
- Serving Size: 1 oz (28g)
- Calories: 140
- Sugar: 0g
- Sodium: 230mg
- Fat: 6g
- Saturated Fat: 1g
- Unsaturated Fat: 5g
- Trans Fat: 0g
- Carbohydrates: 20g
- Fiber: 2g
- Protein: 3g
- Cholesterol: 0mg