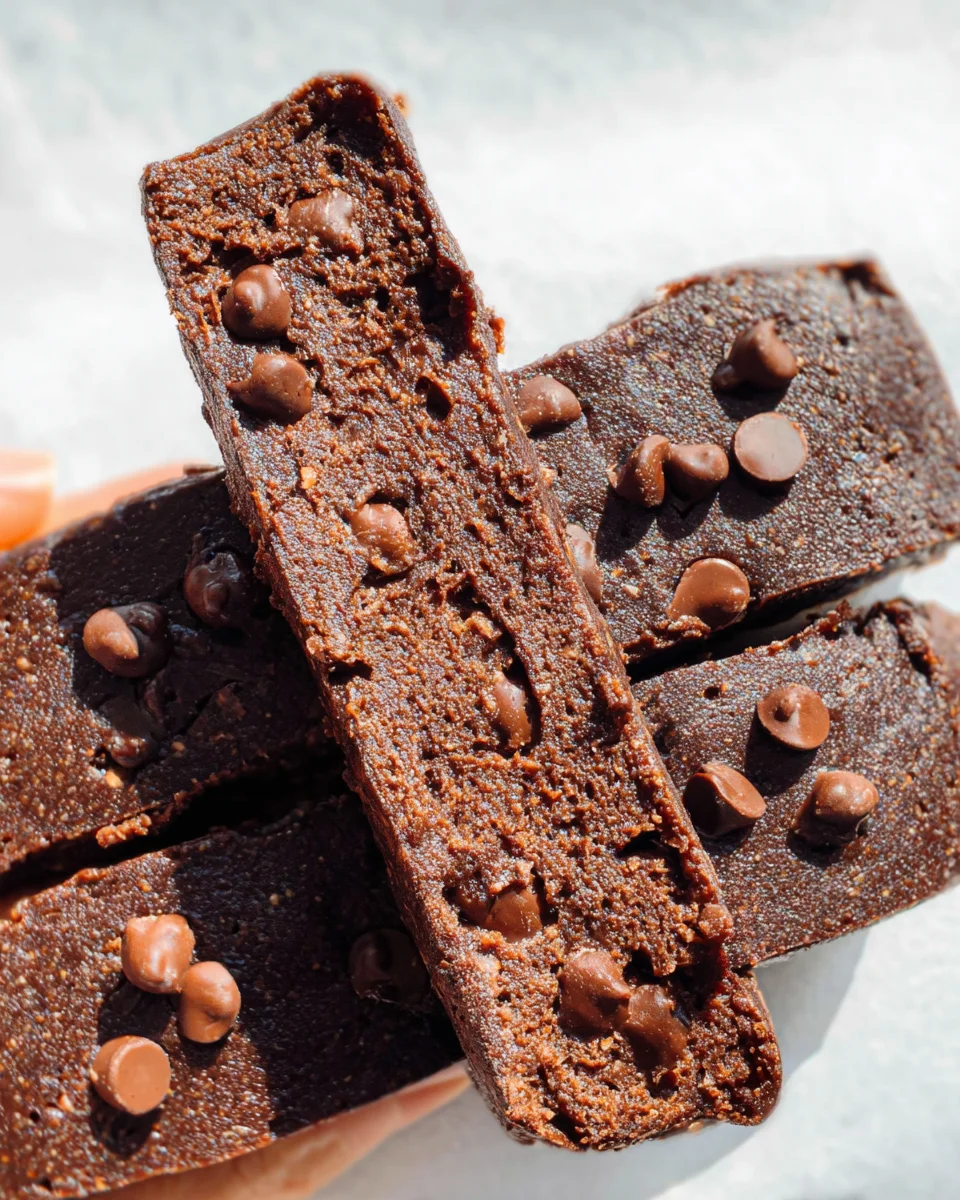
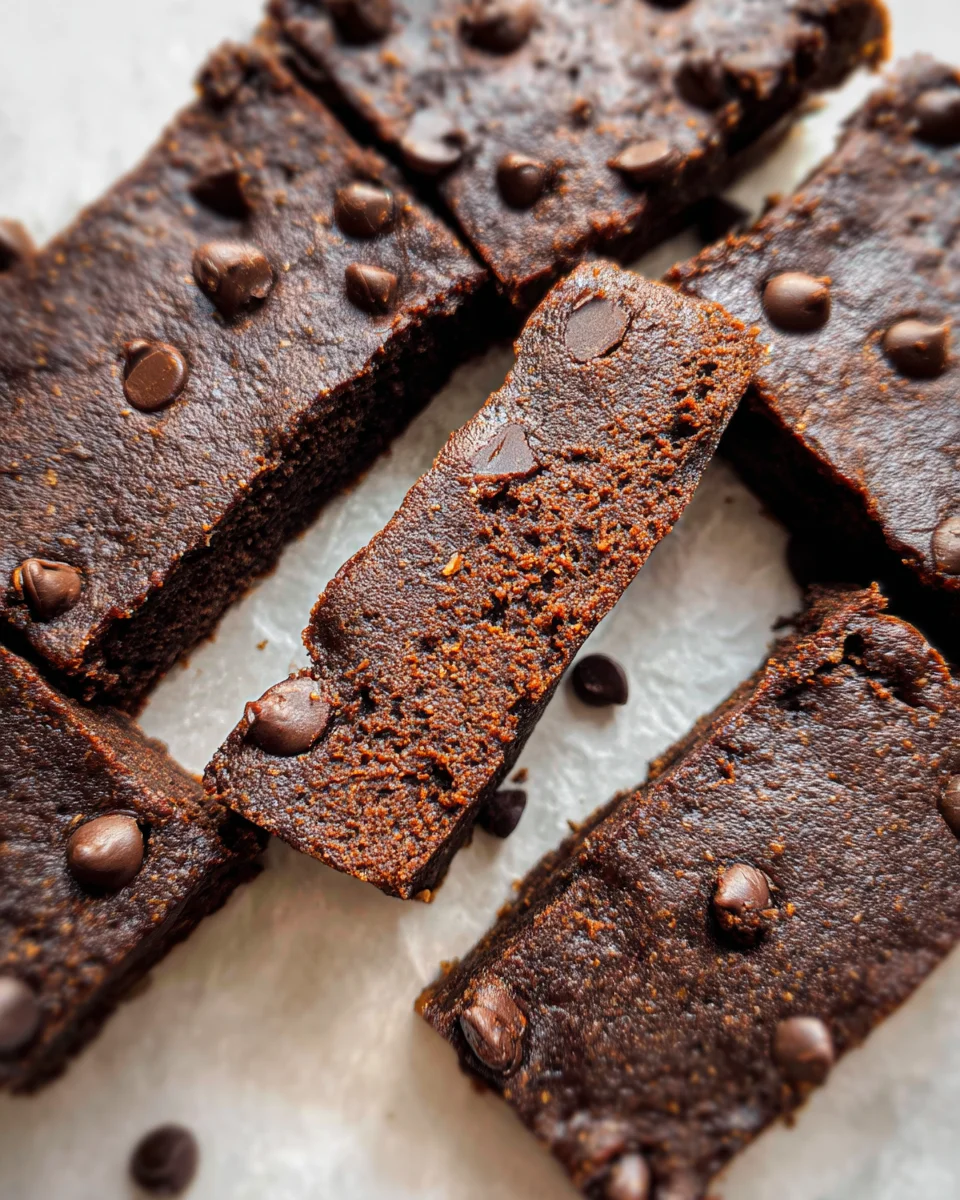
These No-Bake Brownie Protein Bars are a delightful treat that combines the indulgent taste of brownie batter with the benefits of high protein. Perfect for a quick snack or a post-workout boost, these bars are not only easy to make but also require no baking. With just a handful of simple ingredients, you can whip up a batch that delivers 13g of protein each, making them suitable for various occasions—from busy weekdays to weekend gatherings.

Why You’ll Love This Recipe
- High in Protein: Each bar contains 13g of protein, making it a fantastic choice for muscle recovery or energy boosts.
- Quick and Easy: With just 10 minutes of prep time, you can enjoy homemade snacks without the fuss.
- No Baking Required: Say goodbye to preheating the oven! These bars set in the freezer for a simple and convenient process.
- Customizable Ingredients: Feel free to add your favorite nuts or chocolate chips for extra flavor and texture.
- Chewy Texture: The combination of yogurt and oat flour creates a soft yet satisfying chew in every bite.
Tools and Preparation
To make these delicious No-Bake Brownie Protein Bars, you’ll need some essential kitchen tools. Having the right equipment will streamline your preparation process.
Essential Tools and Equipment
- Loaf pan
- Parchment paper
- Mixing bowl
- Wooden spoon
- Blender (if using whole oats)
Importance of Each Tool
- Loaf pan: This is crucial for shaping your bars evenly, ensuring they hold together when sliced.
- Parchment paper: Lining your pan with parchment makes removal easy and prevents sticking.
- Mixing bowl: A large bowl allows you to combine all ingredients without spills.
- Blender: If you opt to blend whole oats into oat flour, this tool will ensure a smooth consistency.
Ingredients
These are the ingredients you’ll need to create your No-Bake Brownie Protein Bars:
Dry Ingredients
- 240 g Oat Flour or Blended Oats (2 cups)
- 80 g Chocolate Protein Powder (⅔ cup)
- 45 g Cocoa Powder (⅓ cup)
- Pinch of Salt (optional)
Wet Ingredients
- 120 g Yogurt (½ cup)
- 80 g Liquid Sweetener (¼ cup)
- 1 tsp Vanilla Extract (optional)
Mix-Ins
- 60 g Chocolate Chips or Nuts (⅓ cup) optional
How to Make No-Bake Brownie Protein Bars
Step 1: Prepare Your Pan
Line your loaf pan with parchment paper for easy removal later.
Step 2: Blend Your Oats
If using whole oats, blend them until they reach a flour-like consistency. Sift if necessary.
Step 3: Combine Dry Ingredients
In a mixing bowl, add:
1. Oat flour
2. Chocolate protein powder
3. Cocoa powder
4. Pinch of salt (if using)
Mix well until combined.
Step 4: Add Wet Ingredients
Add yogurt, liquid sweetener, and vanilla extract to the dry mixture. Stir with a wooden spoon until everything is well blended.
Step 5: Adjust Consistency
If the mixture feels too wet, add more cocoa powder; if it’s too dry, stir in additional yogurt until you achieve a thick batter-like texture.
Step 6: Fold in Mix-Ins
Gently fold in chocolate chips or nuts if desired.
Step 7: Press Mixture into Pan
Transfer the mixture into your prepared loaf pan. Press it down firmly and evenly to ensure it holds together once chilled.
Step 8: Chill
Place the pan in the freezer for at least 10 minutes or until the mixture is solidified.
Step 9: Slice and Store
Once set, slice into either 8 bars or 16 squares. For optimal texture, store them in the fridge for a chewy bite or in the freezer for firmer bars.
Enjoy your homemade No-Bake Brownie Protein Bars as a delicious snack that packs both flavor and nutrition!
How to Serve No-Bake Brownie Protein Bars
No-Bake Brownie Protein Bars are versatile and can be enjoyed in various ways. Whether you’re looking for a quick snack or a satisfying dessert, these bars fit the bill perfectly.
As a Snack on the Go
- Easy to carry: Pack a bar in your bag for a protein boost while out.
- Perfect for travel: Enjoy them during long trips or hikes.
With Fresh Fruit
- Pair with bananas: The sweetness of bananas complements the chocolate flavor.
- Berries on the side: Strawberries or blueberries add freshness and acidity.
Crumbled over Yogurt
- Delicious topping: Crumble bars over yogurt for added texture and flavor.
- Great breakfast option: Combine with Greek yogurt for a high-protein meal.
Dipped in Nut Butter
- Creamy addition: Dip half of the bar in almond or peanut butter for extra richness.
- Satisfies cravings: The combination of flavors satisfies sweet tooth cravings.
How to Perfect No-Bake Brownie Protein Bars
To get the best results when making No-Bake Brownie Protein Bars, follow these helpful tips.
- Choose quality ingredients: Use high-quality protein powder and cocoa for rich flavor.
- Adjust sweetness: Feel free to modify the liquid sweetener based on personal taste preferences.
- Mix thoroughly: Ensure all ingredients are well combined for uniform texture and flavor.
- Press firmly: When placing the mixture in the pan, press it down tightly to create sturdy bars.
- Chill adequately: Allow enough time in the freezer to ensure bars hold their shape when sliced.
- Experiment with add-ins: Try adding dried fruits or seeds for different textures and flavors.
Best Side Dishes for No-Bake Brownie Protein Bars
No-Bake Brownie Protein Bars can be paired with various side dishes for an enjoyable meal experience. Here are some great options:
- Fresh Fruit Salad – A mix of seasonal fruits adds brightness and balance to your snack.
- Greek Yogurt Parfait – Layered with yogurt and berries, this dish enhances your protein intake.
- Cottage Cheese – A creamy side that pairs well with the chewy texture of brownie bars.
- Nut Butter Dip – Serve bars alongside almond or peanut butter for added richness and flavor.
- Chia Seed Pudding – A light and nutritious option that complements the bar’s chocolatey taste.
- Trail Mix – A crunchy mix of nuts and seeds provides a fun contrast in textures.
Common Mistakes to Avoid
Creating No-Bake Brownie Protein Bars can be simple and enjoyable, but there are a few common mistakes that you should avoid for the best results.
- Skipping the parchment paper: Not lining your loaf pan can make it difficult to remove your bars. Always use parchment paper for easy lifting.
- Using too much liquid: Adding too much yogurt or sweetener can make the mixture too wet. Adjust by adding more cocoa powder to achieve the right consistency.
- Not pressing firmly enough: If you don’t press the mixture firmly into the pan, your bars may crumble. Make sure to pack it tightly for better structure.
- Overlooking optional ingredients: Ignoring chocolate chips or nuts can lessen flavor and texture. Consider adding them for extra enjoyment.
- Cutting too soon: Slicing your bars before they’re fully set can lead to messy pieces. Freeze for at least 10 minutes to ensure they hold their shape.
Storage & Reheating Instructions
Refrigerator Storage
- Store your No-Bake Brownie Protein Bars in an airtight container.
- They will last up to one week in the refrigerator.
Freezing No-Bake Brownie Protein Bars
- For longer storage, wrap each bar individually in plastic wrap or foil.
- They can be frozen for up to three months.
Reheating No-Bake Brownie Protein Bars
- Oven: Preheat to 350°F (175°C) and warm for about 5-10 minutes until soft.
- Microwave: Heat a single bar on medium power for 10-15 seconds until just warm.
- Stovetop: Place in a skillet over low heat, flipping occasionally until warmed through.
Frequently Asked Questions
Here are some common questions about making No-Bake Brownie Protein Bars.
Can I use regular flour instead of oat flour?
Yes, but using oat flour or blended oats offers a better texture and adds nutritional value.
How can I make these bars vegan?
To make vegan No-Bake Brownie Protein Bars, substitute yogurt with a plant-based yogurt alternative.
What can I add for more flavor?
You can include spices like cinnamon or nutmeg, or even a scoop of nut butter for added richness.
How do I know when my bars are set?
Your bars should feel firm and solid after being in the freezer for at least 10 minutes.
Final Thoughts
These No-Bake Brownie Protein Bars are an excellent choice for anyone looking for a healthy snack that satisfies chocolate cravings. The recipe is versatile; feel free to customize it with different mix-ins like dried fruit or seeds. Give it a try and enjoy these delicious treats anytime!
No-Bake Brownie Protein Bars

Indulge in these No-Bake Brownie Protein Bars, a delicious fusion of brownie batter flavor and high-protein goodness! Perfect for a quick snack or post-workout boost, these bars are not only simple to prepare but also require no baking. With just a few wholesome ingredients, you can enjoy 13g of protein in every bar, making them an ideal choice for busy weekdays or social gatherings. Customize them with your favorite mix-ins like chocolate chips or nuts for extra texture.
- Prep Time: 10 minutes
- Cook Time: 0 minutes
- Total Time: 10 minutes
- Yield: Approximately 8 bars
- Category: Dessert
- Method: No Bake
- Cuisine: American
Ingredients
- 240 g Oat Flour (or blended oats)
- 80 g Chocolate Protein Powder
- 45 g Cocoa Powder
- 120 g Yogurt
- 80 g Liquid Sweetener
- Optional: Chocolate Chips or Nuts
Instructions
- Line a loaf pan with parchment paper.
- If using whole oats, blend until they reach a flour-like consistency.
- In a mixing bowl, combine oat flour, protein powder, cocoa powder, and salt.
- Stir in yogurt, liquid sweetener, and vanilla extract until well mixed.
- Adjust the consistency if needed by adding more cocoa or yogurt.
- Fold in optional chocolate chips or nuts.
- Press the mixture firmly into the prepared pan.
- Chill in the freezer for at least 10 minutes until set.
- Slice into bars or squares and store as desired.
Nutrition
- Serving Size: 1 serving
- Calories: 160
- Sugar: 5g
- Sodium: 40mg
- Fat: 6g
- Saturated Fat: 2g
- Unsaturated Fat: 4g
- Trans Fat: 0g
- Carbohydrates: 20g
- Fiber: 4g
- Protein: 13g
- Cholesterol: 0mg