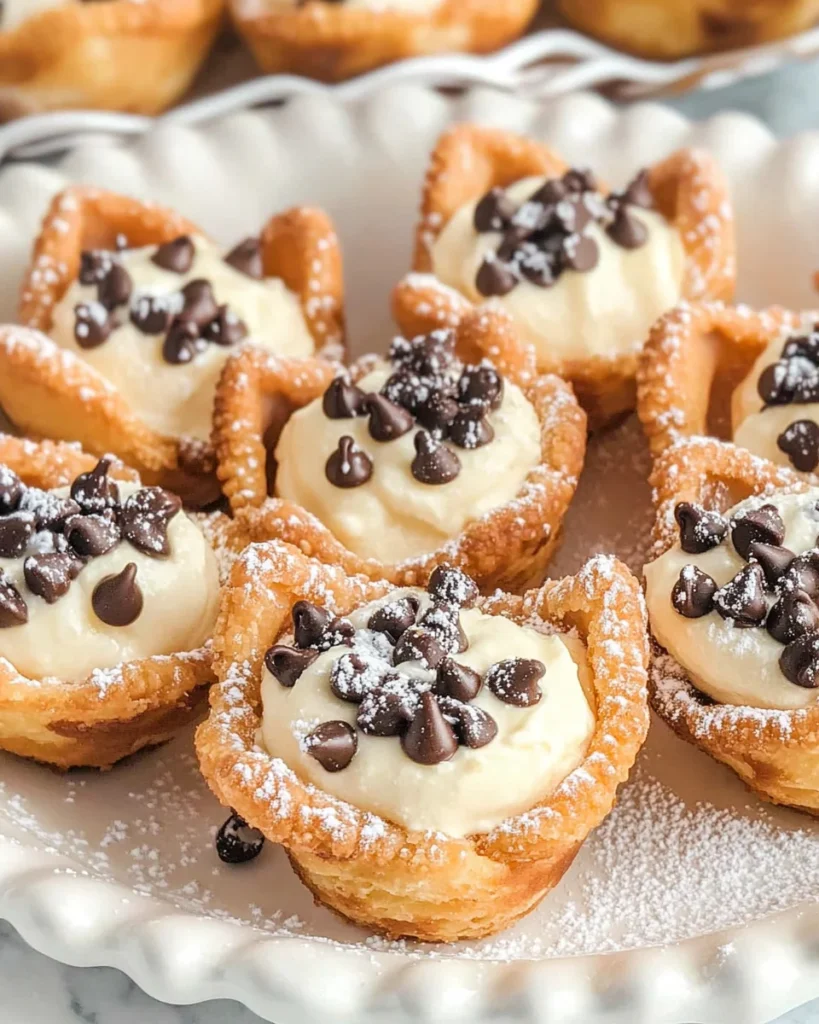
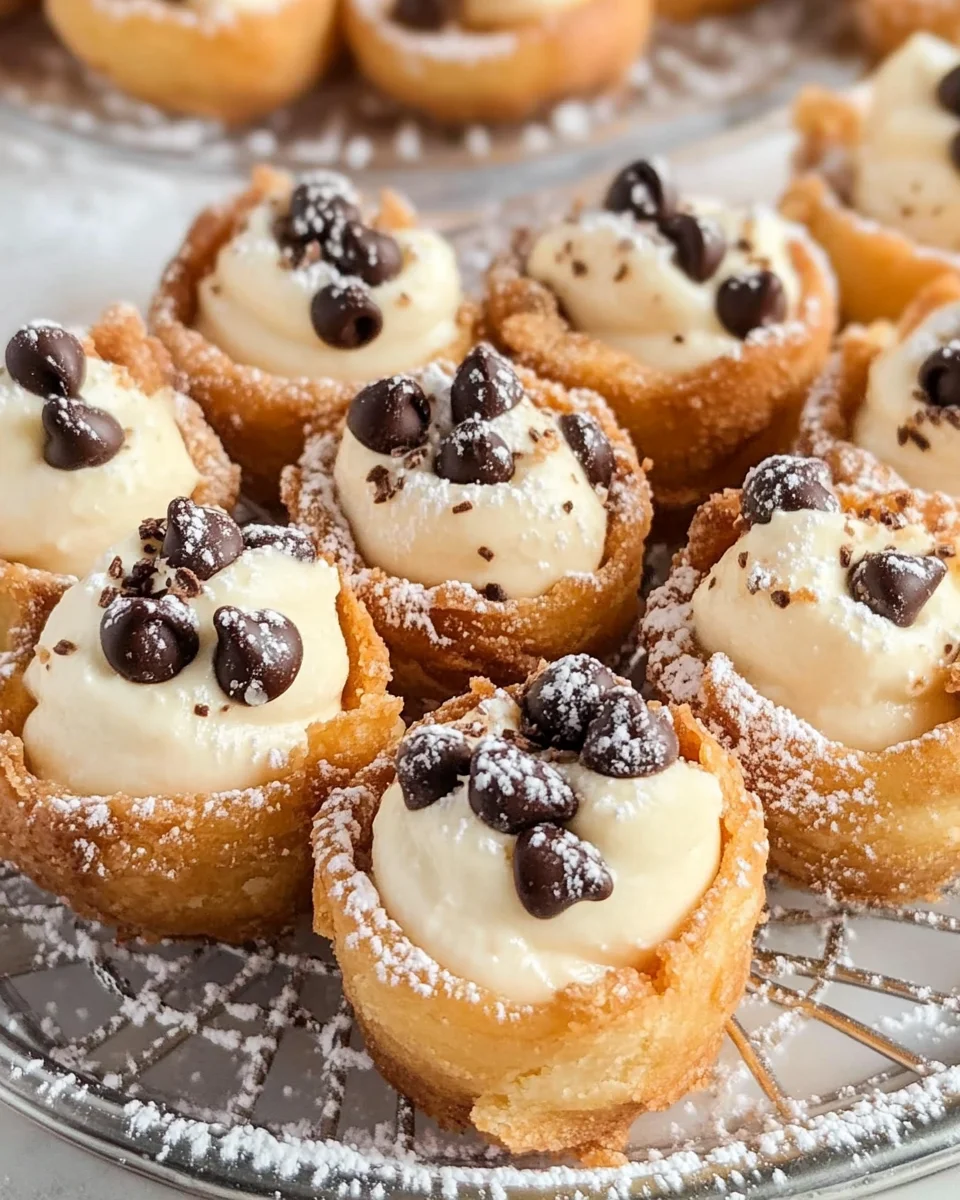
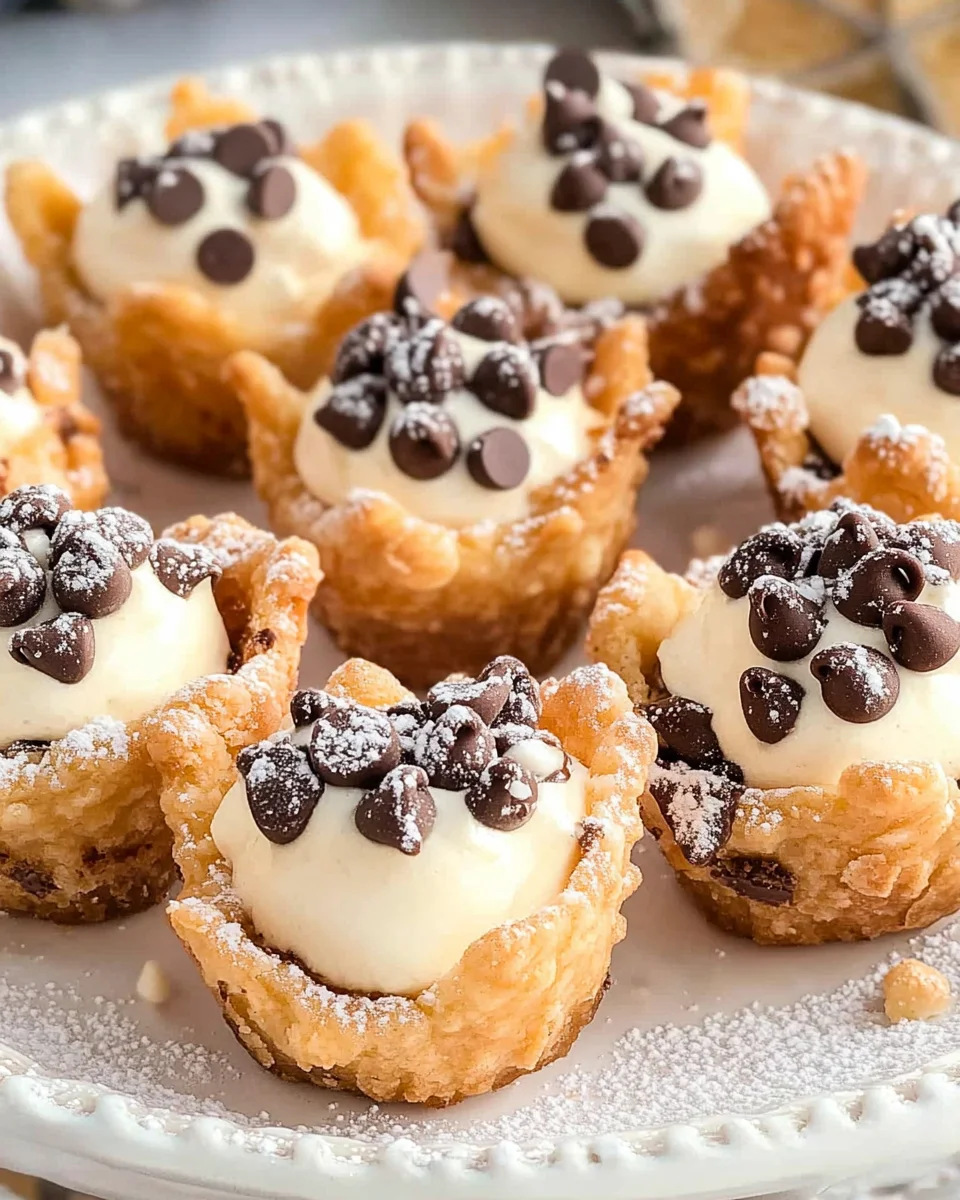
Be the star of any party or get-together with these amazingly easy and delicious Mini Cannoli Cups! A real crowd-pleaser, these delightful treats are perfect for any occasion, from birthday parties to holiday gatherings. With their crispy pastry cups filled with creamy ricotta filling and topped with chocolate chips or pistachios, they offer a unique twist on the classic Italian dessert. Plus, they’re simple to make and sure to impress your guests!
Why You’ll Love This Recipe
- Quick Preparation: This recipe takes just 15 minutes of prep time, making it ideal for last-minute gatherings.
- Crowd-Pleasing Flavor: The combination of sweet ricotta and a hint of citrus zest creates a flavor that everyone will love.
- Versatile Toppings: Customize your Mini Cannoli Cups with chocolate chips or pistachios based on your preference.
- Perfect for Sharing: Each cup is bite-sized, making them easy to share at parties or events.
- Elegant Presentation: These mini desserts look beautiful on any dessert table, adding a touch of elegance.
Tools and Preparation
Before you start making these Mini Cannoli Cups, gather your tools and equipment. Having everything ready will ensure a smooth cooking process.
Essential Tools and Equipment
- Rolling pin
- 2½-inch round cookie cutter
- Mini muffin tin
- Electric mixer
- 1-gallon zip-top resealable bag
Importance of Each Tool
- Rolling pin: Helps flatten the pie crust evenly for consistent baking.
- Mini muffin tin: Creates perfectly shaped cups for holding the delicious filling.
- Electric mixer: Ensures the filling is creamy and well combined quickly.
Ingredients
Here’s what you’ll need to create these delightful Mini Cannoli Cups:
For the Filling
- 1 container whole-milk ricotta cheese (15 oz., drained)
- 1/2 cup powdered sugar
- 2 tablespoons granulated sugar
- 1 teaspoon finely grated orange or lemon zest
- 1/2 teaspoon vanilla extract
For the Pastry Cups
- 1 box refrigerated pie crusts, softened as directed on box (2 count)
- 3 tablespoons turbinado sugar (raw sugar)
- 1 teaspoon ground cinnamon
Toppings
- 1/4 cup miniature semisweet chocolate chips or finely chopped pistachios
- Additional powdered sugar for dusting
How to Make Mini Cannoli Cups
Step 1: Preheat the Oven
Preheat your oven to 425°F. This ensures your pastry cups bake correctly and turn golden brown.
Step 2: Prepare the Pie Crusts
Lightly flour a work surface and unroll the pie crusts.
Sprinkle both pie crusts with turbinado sugar and cinnamon.
Gently roll a rolling pin over the top to press the mixture into the dough.
Use a 2½-inch round cookie cutter to cut out pastry rounds.
Press each round gently into ungreased mini muffin cups. You may need to re-roll scraps to get enough rounds (48 total).
Step 3: Bake the Pastry Cups
Bake in preheated oven for about 10 minutes, or until golden brown.
Allow cannoli cups to cool completely in the pans for about 15 minutes before transferring them to a wire rack.
Step 4: Make the Filling
While the cups cool, prepare the filling:
Beat all filling ingredients together in a large mixing bowl using an electric mixer on medium speed until creamy.
Transfer filling into a 1-gallon zip-top resealable bag, seal it tightly, and refrigerate until ready to serve.
Step 5: Fill the Cups
Just before serving:
Remove the filling from refrigeration.
Snip one corner off of the bag and pipe approximately 1 tablespoon of filling into each cooled pastry cup.
Step 6: Add Toppings and Serve
Sprinkle each filled cup with mini chocolate chips or chopped pistachios. Dust lightly with additional powdered sugar before serving immediately. Enjoy your homemade Mini Cannoli Cups!
How to Serve Mini Cannoli Cups
Mini Cannoli Cups are delightful treats that can bring joy to any gathering. Whether you’re hosting a party or simply enjoying a sweet moment at home, these cups can be served in various creative ways.
Individual Serving Suggestions
- With Fresh Berries: Add a few fresh strawberries, blueberries, or raspberries on the side for a pop of color and freshness.
- Drizzled with Chocolate: A light drizzle of chocolate sauce over the cups adds an extra layer of sweetness and elegance.
- On a Dessert Platter: Arrange Mini Cannoli Cups on a decorative platter alongside other desserts for an impressive display.
- Sprinkled with Nuts: Top each cup with chopped pistachios or almonds to bring in a nutty crunch and enhance the flavor.
- Accompanied by Coffee: Serve these cups with espresso or cappuccino for a perfect Italian-inspired dessert experience.
How to Perfect Mini Cannoli Cups
To ensure your Mini Cannoli Cups turn out perfectly every time, consider these helpful tips.
- Chill the Filling: Allowing the filling to chill before piping helps it maintain its shape and texture when served.
- Use Fresh Ingredients: For the best flavor, opt for high-quality ricotta cheese and fresh citrus zest.
- Monitor Baking Time: Keep an eye on the pastry cups while baking. They should be golden brown but not overly dark.
- Avoid Overfilling: Pipe just enough filling into each cup. Overfilling can lead to messy servings and soggy crusts.
- Experiment with Flavors: Don’t hesitate to try variations in zest or add flavored extracts like almond for a unique twist.
Best Side Dishes for Mini Cannoli Cups
Pairing your Mini Cannoli Cups with complementary side dishes can create a well-rounded dessert experience. Here are some delicious options.
- Italian Biscotti: These crunchy cookies are perfect for dipping in coffee and pair well with the creamy cannoli cups.
- Tiramisu Bites: Small portions of tiramisu provide a classic Italian flavor that complements the sweetness of cannoli.
- Fruit Salad: A light fruit salad adds freshness and balances out the richness of the cannoli cups.
- Panna Cotta: This smooth Italian dessert provides a creamy counterpart that contrasts beautifully with the crispy cannoli shells.
- Gelato: A scoop of gelato, especially flavors like vanilla or hazelnut, offers a refreshing touch alongside the mini treats.
- Chocolate Mousse: Rich chocolate mousse brings an indulgent element to your dessert table that pairs wonderfully with cannolis.
Common Mistakes to Avoid
Making Mini Cannoli Cups can be straightforward, but a few common mistakes can affect the outcome. Here are some pitfalls to avoid.
- Not draining the ricotta cheese: Failing to drain the ricotta can result in a watery filling. Always drain it well to achieve the perfect creamy texture.
- Skipping the sugar on crusts: Not sprinkling turbinado sugar and cinnamon on the crusts may lead to bland flavors. This step is crucial for adding that delightful sweetness and crunch.
- Overbaking the cups: Baking too long can make your cups too hard. Watch them closely and remove them as soon as they turn golden brown.
- Piping filling too early: Filling the cups before they cool can make them soggy. Wait until they’re completely cooled for the best texture.
- Ignoring ingredient temperature: Using cold ingredients can affect how well they blend. Ensure your ricotta and other ingredients are at room temperature for a smoother filling.
Storage & Reheating Instructions
Refrigerator Storage
- Store Mini Cannoli Cups in an airtight container.
- They will last up to 3 days in the refrigerator.
Freezing Mini Cannoli Cups
- Freeze unfilled pastry shells for up to 2 months.
- Seal them in a freezer-safe bag or container.
Reheating Mini Cannoli Cups
- Oven: Preheat to 350°F and warm for about 10 minutes. This keeps the crust crispy.
- Microwave: Heat on medium power for 15-20 seconds. Be cautious not to overheat, as it may soften the crust.
- Stovetop: Place in a skillet over low heat, covering with a lid for a few minutes. This method helps maintain crispiness.
Frequently Asked Questions
If you’re curious about Mini Cannoli Cups, here are some frequently asked questions.
How do I make Mini Cannoli Cups gluten-free?
You can use gluten-free pie crusts instead of regular ones. Follow the same method for cutting and baking.
Can I customize the filling for Mini Cannoli Cups?
Absolutely! You can add flavors like chocolate or coffee to your filling. Experiment with different extracts or even fruit purees!
How long do Mini Cannoli Cups last?
When stored properly, they last up to three days in the refrigerator, but be sure to fill them just before serving.
Are Mini Cannoli Cups suitable for parties?
Yes! They are bite-sized and easy to eat, making them perfect for sharing at any gathering or celebration.
Final Thoughts
These Mini Cannoli Cups are not only delicious but also incredibly versatile! They make an excellent dessert option for any occasion. Feel free to customize your filling with various flavors or toppings, making each batch uniquely yours. Give this recipe a try; you’ll be delighted by how easy and enjoyable it is!
Mini Cannoli Cups

Indulge your guests with these delightful Mini Cannoli Cups, the perfect bite-sized treat for any occasion! Crisp pastry shells are filled with a rich and creamy ricotta mixture, creating an irresistible combination that will impress at birthdays, holidays, or casual gatherings. With just 15 minutes of prep time, these easy-to-make desserts can be customized with toppings like chocolate chips or pistachios to suit your taste. Their elegant presentation makes them a charming addition to any dessert table, sure to please everyone from children to adults!
- Prep Time: 15 minutes
- Cook Time: 10 minutes
- Total Time: 25 minutes
- Yield: Makes approximately 24 Mini Cannoli Cups 1x
- Category: Dessert
- Method: Baking
- Cuisine: Italian
Ingredients
- 1 container whole-milk ricotta cheese (15 oz.)
- 1/2 cup powdered sugar
- 2 tablespoons granulated sugar
- 1 teaspoon finely grated orange or lemon zest
- 1 box refrigerated pie crusts (2 count)
- 3 tablespoons turbinado sugar
- Toppings: chocolate chips or chopped pistachios
Instructions
- Preheat your oven to 425°F.
- Lightly flour a surface and unroll the pie crusts. Sprinkle with turbinado sugar and cinnamon, then roll gently to combine.
- Cut out rounds using a cookie cutter and press into mini muffin tins.
- Bake for about 10 minutes until golden brown; cool in pans for 15 minutes.
- In a bowl, use an electric mixer to beat the ricotta, powdered sugar, granulated sugar, citrus zest, and vanilla until creamy.
- Transfer filling to a zip-top bag and chill until serving. Pipe into cooled cups and top with chosen toppings.
Nutrition
- Serving Size: 1 serving
- Calories: 75
- Sugar: 5g
- Sodium: 50mg
- Fat: 4g
- Saturated Fat: 2g
- Unsaturated Fat: 1g
- Trans Fat: 0g
- Carbohydrates: 8g
- Fiber: <1g
- Protein: 2g
- Cholesterol: 10mg