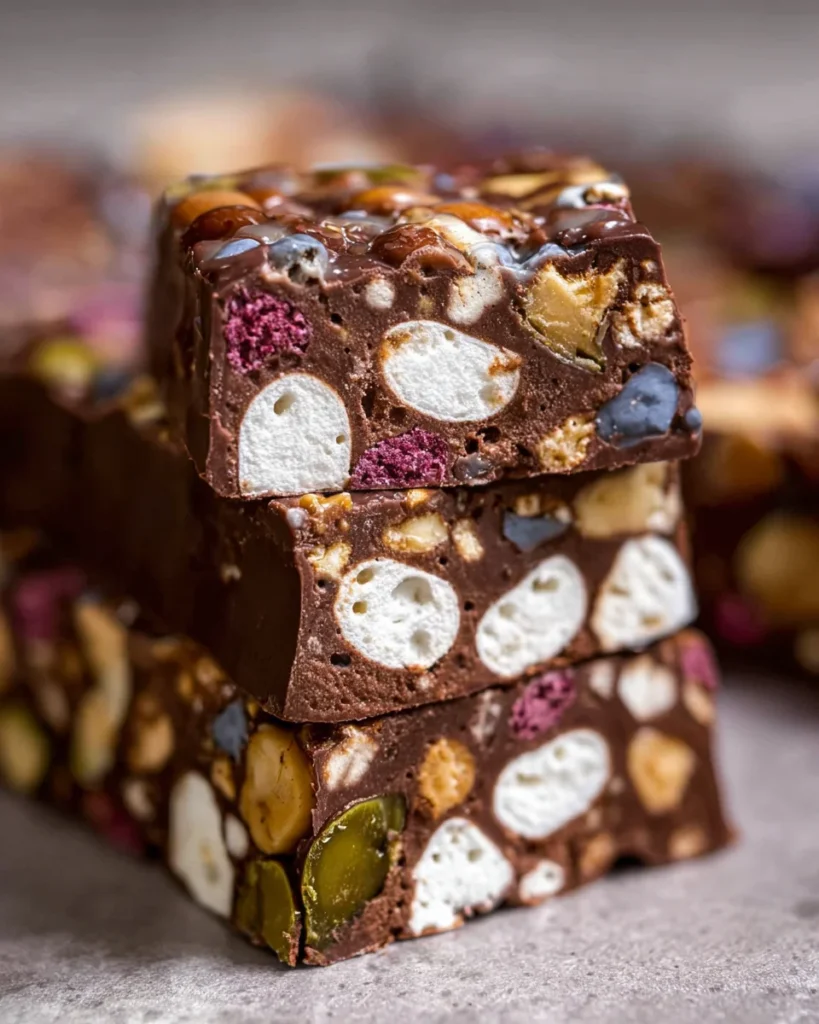
Homemade Rocky Road Protein Bars are a delicious and nutritious snack that you can easily make at home. These bars are perfect for a pre-workout boost, as a midday snack, or even as a sweet treat after dinner. With their rich chocolate flavor and customizable mix-ins, they stand out as a healthier alternative to store-bought options. Plus, they’re quick to prepare—just 10 minutes in one bowl!
Why You’ll Love This Recipe
- Quick Preparation: In just 10 minutes, you can whip up a batch of these tasty protein bars.
- Customizable Ingredients: Tailor the recipe to your taste by choosing your favorite mix-ins like nuts, marshmallows, or dried fruits.
- Healthy Alternative: Packed with protein and made from wholesome ingredients, these bars are a guilt-free indulgence.
- Gluten-Free and Vegan Options: Easily adjust the recipe to suit dietary preferences without sacrificing flavor.
- Perfect for Any Occasion: Whether it’s for a workout snack or an afternoon treat, these bars fit seamlessly into your day.
Tools and Preparation
To make Homemade Rocky Road Protein Bars, you’ll need some essential tools. Having the right equipment makes preparation easier and ensures great results.
Essential Tools and Equipment
- Heat-proof mixing bowl
- Microwave or double boiler
- Loaf tin or Tupperware
- Parchment paper
- Sharp knife
Importance of Each Tool
- Heat-proof mixing bowl: Essential for melting chocolate safely without damaging it.
- Sharp knife: Ensures clean cuts when slicing your protein bars for a perfect presentation.
Ingredients
Chocolate Base
- 75 g Dark Chocolate (¾ cup)
- 3 tbsp Nut Butter
Protein Addition
- 45 g Chocolate Protein Powder (⅓ cup)
- 2 tbsp Liquid Sweetener
Mix-ins
- 1 cup Mix-ins: Marshmallows, Crispy Cereal, Nuts, Dried Berries, Coconut etc.
How to Make Homemade Rocky Road Protein Bars
Step 1: Melt the Chocolate
Add your chocolate and nut butter to a heat-proof mixing bowl. Melt it in the microwave for about 30 seconds at a time until smooth or use the double boiler method.
Step 2: Combine Ingredients
Next, add in your protein powder and liquid sweetener. Fold until everything is well combined.
Step 3: Add Your Mix-ins
Fold in your chosen mix-ins such as marshmallows, nuts, or dried berries until evenly distributed through the mixture.
Step 4: Set in the Tin
Transfer the mixture into a loaf tin or Tupperware lined with parchment paper. Press it down firmly to ensure it holds together.
Step 5: Chill and Slice
Refrigerate for at least one hour. Once set, carefully remove the rocky road from the tin and slice it using a sharp knife into 12 bars.
Enjoy your Homemade Rocky Road Protein Bars as a nutritious snack any time of day!
How to Serve Homemade Rocky Road Protein Bars
Homemade rocky road protein bars are versatile and can be enjoyed in various ways. Here are some creative serving suggestions to enhance your snacking experience.
As a Pre-Workout Snack
- These bars provide a quick energy boost when you need it most before your workout session.
Crumbled Over Yogurt
- Add some texture and flavor by crumbling the bars over a bowl of yogurt. This makes for a delicious breakfast or snack.
Dipped in Chocolate
- For an extra indulgent treat, dip the bars in melted dark chocolate before serving. This adds richness and enhances the chocolate flavor.
Paired with Fresh Fruit
- Serve your bars alongside fresh fruit like bananas or berries for a balanced snack that satisfies sweet cravings.
In Lunchboxes
- Pack these bars into lunchboxes for a nutritious snack that kids and adults will love. They’re easy to grab on the go!
As Dessert Bites
- Cut the bars into bite-sized pieces for a fun dessert option at parties or gatherings. They are sure to be a hit!
How to Perfect Homemade Rocky Road Protein Bars
Making the perfect homemade rocky road protein bars is simple if you follow a few key tips. Here’s how to elevate your recipe.
Use Quality Ingredients: Choose high-quality dark chocolate and nut butter for rich flavor. This will make your bars taste even better.
Customize Your Mix-ins: Feel free to get creative! Use nuts, seeds, or dried fruits based on your preference to enhance texture and nutrition.
Don’t Skip Refrigeration: Allowing your bars to chill properly helps them set up nicely, making them easier to slice without crumbling.
Experiment with Flavors: Try adding spices like cinnamon or vanilla extract to give your protein bars a unique twist without extra calories.
Best Side Dishes for Homemade Rocky Road Protein Bars
Pairing side dishes with homemade rocky road protein bars can create a more balanced meal or snack time. Here are some tasty options:
Smoothie Bowl: A vibrant smoothie bowl topped with fruits and seeds complements the sweetness of the protein bars nicely.
Nutty Trail Mix: Combine different nuts and seeds for an easy-to-make trail mix that adds crunch and protein.
Veggie Sticks with Hummus: Crunchy vegetable sticks served with hummus provide fiber and nutrients alongside your sweet treat.
Cheese Platter: A selection of cheeses can balance the sweetness of the bars, offering savory flavors as well.
Fruit Salad: A fresh fruit salad brings brightness and hydration, making it a refreshing choice next to the rich protein bars.
Chia Pudding: Pairing with chia pudding gives an additional layer of health benefits while enhancing texture contrast.
Common Mistakes to Avoid
Making homemade rocky road protein bars can be simple, but there are common pitfalls to watch out for.
- Ignoring Ingredient Quality: Using low-quality chocolate or nut butter can affect the taste. Always choose high-quality ingredients for the best flavor.
- Overmixing the Batter: Mixing too vigorously can make your bars dense. Fold gently until just combined for a lighter texture.
- Not Measuring Accurately: Eyeballing amounts can lead to inconsistent results. Use a kitchen scale or measuring cups for precision.
- Skipping the Refrigeration Step: Not chilling the mixture long enough can result in crumbly bars. Allow them to set in the fridge for at least an hour.
- Using Non-Stick Spray on Parchment Paper: This can create a slippery surface that makes it hard to slice your bars. Simply line your tin with parchment without additional sprays.

Storage & Reheating Instructions
Refrigerator Storage
- Store in an airtight container for up to 1 week.
- Place parchment paper between layers to prevent sticking.
Freezing Homemade Rocky Road Protein Bars
- Wrap each bar individually in plastic wrap and then place them in a freezer bag.
- They will last up to 3 months in the freezer.
Reheating Homemade Rocky Road Protein Bars
- Oven: Preheat to 350°F (175°C) and warm bars for about 5 minutes.
- Microwave: Heat individually for 10-15 seconds for a soft texture.
- Stovetop: Use a skillet on low heat, flipping occasionally until warmed through.
Frequently Asked Questions
Here are some common questions about homemade rocky road protein bars.
What are Homemade Rocky Road Protein Bars?
Homemade rocky road protein bars are delicious snacks made from chocolate, nut butter, and various mix-ins like marshmallows and nuts.
Can I make these bars gluten-free?
Yes! Use gluten-free crispy cereal and ensure other ingredients are certified gluten-free.
How long do these protein bars last?
When stored properly in the fridge, they last about a week. If frozen, they can stay fresh for up to three months.
Can I customize the mix-ins?
Absolutely! You can add your favorite nuts, dried fruits, or even seeds based on your preferences.
Are Homemade Rocky Road Protein Bars suitable for vegans?
Yes! By using dairy-free chocolate and plant-based nut butter, these bars can easily be made vegan-friendly.
Final Thoughts
Homemade rocky road protein bars are not only easy to make but also incredibly versatile. You can customize them with your favorite ingredients, making them perfect for any dietary preference or craving. Give this recipe a try, and enjoy a delightful treat that satisfies both your sweet tooth and your nutritional needs!
Homemade Rocky Road Protein Bars

Indulge in the goodness of Homemade Rocky Road Protein Bars, a delectable and nutritious treat that you can whip up in just 10 minutes. Perfect for a pre-workout boost or a satisfying snack, these bars feature a rich chocolate flavor complemented by customizable mix-ins like nuts, marshmallows, and dried fruits. They serve as a healthier alternative to store-bought options, offering a guilt-free indulgence that fits your dietary needs. With gluten-free and vegan variations available, these bars are designed to suit everyone’s palate. Make them ahead of time for a quick energy boost throughout the week!
- Prep Time: 10 minutes
- Cook Time: None
- Total Time: 0 hours
- Yield: Approximately 12 servings 1x
- Category: Dessert
- Method: No-bake
- Cuisine: American
Ingredients
- 75 g Dark Chocolate (¾ cup)
- 3 tbsp Nut Butter
- 45 g Chocolate Protein Powder (⅓ cup)
- 2 tbsp Liquid Sweetener
- 1 cup Mix-ins (Marshmallows, Crispy Cereal, Nuts, Dried Berries, Coconut)
Instructions
- Melt the dark chocolate and nut butter together in a heat-proof mixing bowl using a microwave or double boiler until smooth.
- Stir in the chocolate protein powder and liquid sweetener until well combined.
- Fold in your chosen mix-ins until evenly distributed in the mixture.
- Transfer to a lined loaf tin or Tupperware, pressing down firmly.
- Refrigerate for at least one hour until set. Slice into bars and enjoy!
Nutrition
- Serving Size: 1 serving
- Calories: 173
- Sugar: 6g
- Sodium: 32mg
- Fat: 9g
- Saturated Fat: 3g
- Unsaturated Fat: 6g
- Trans Fat: 0g
- Carbohydrates: 18g
- Fiber: 2g
- Protein: 6g
- Cholesterol: 0mg